How Much Does It Cost To Renovate Your Bathroom and Do-It-Yourself?

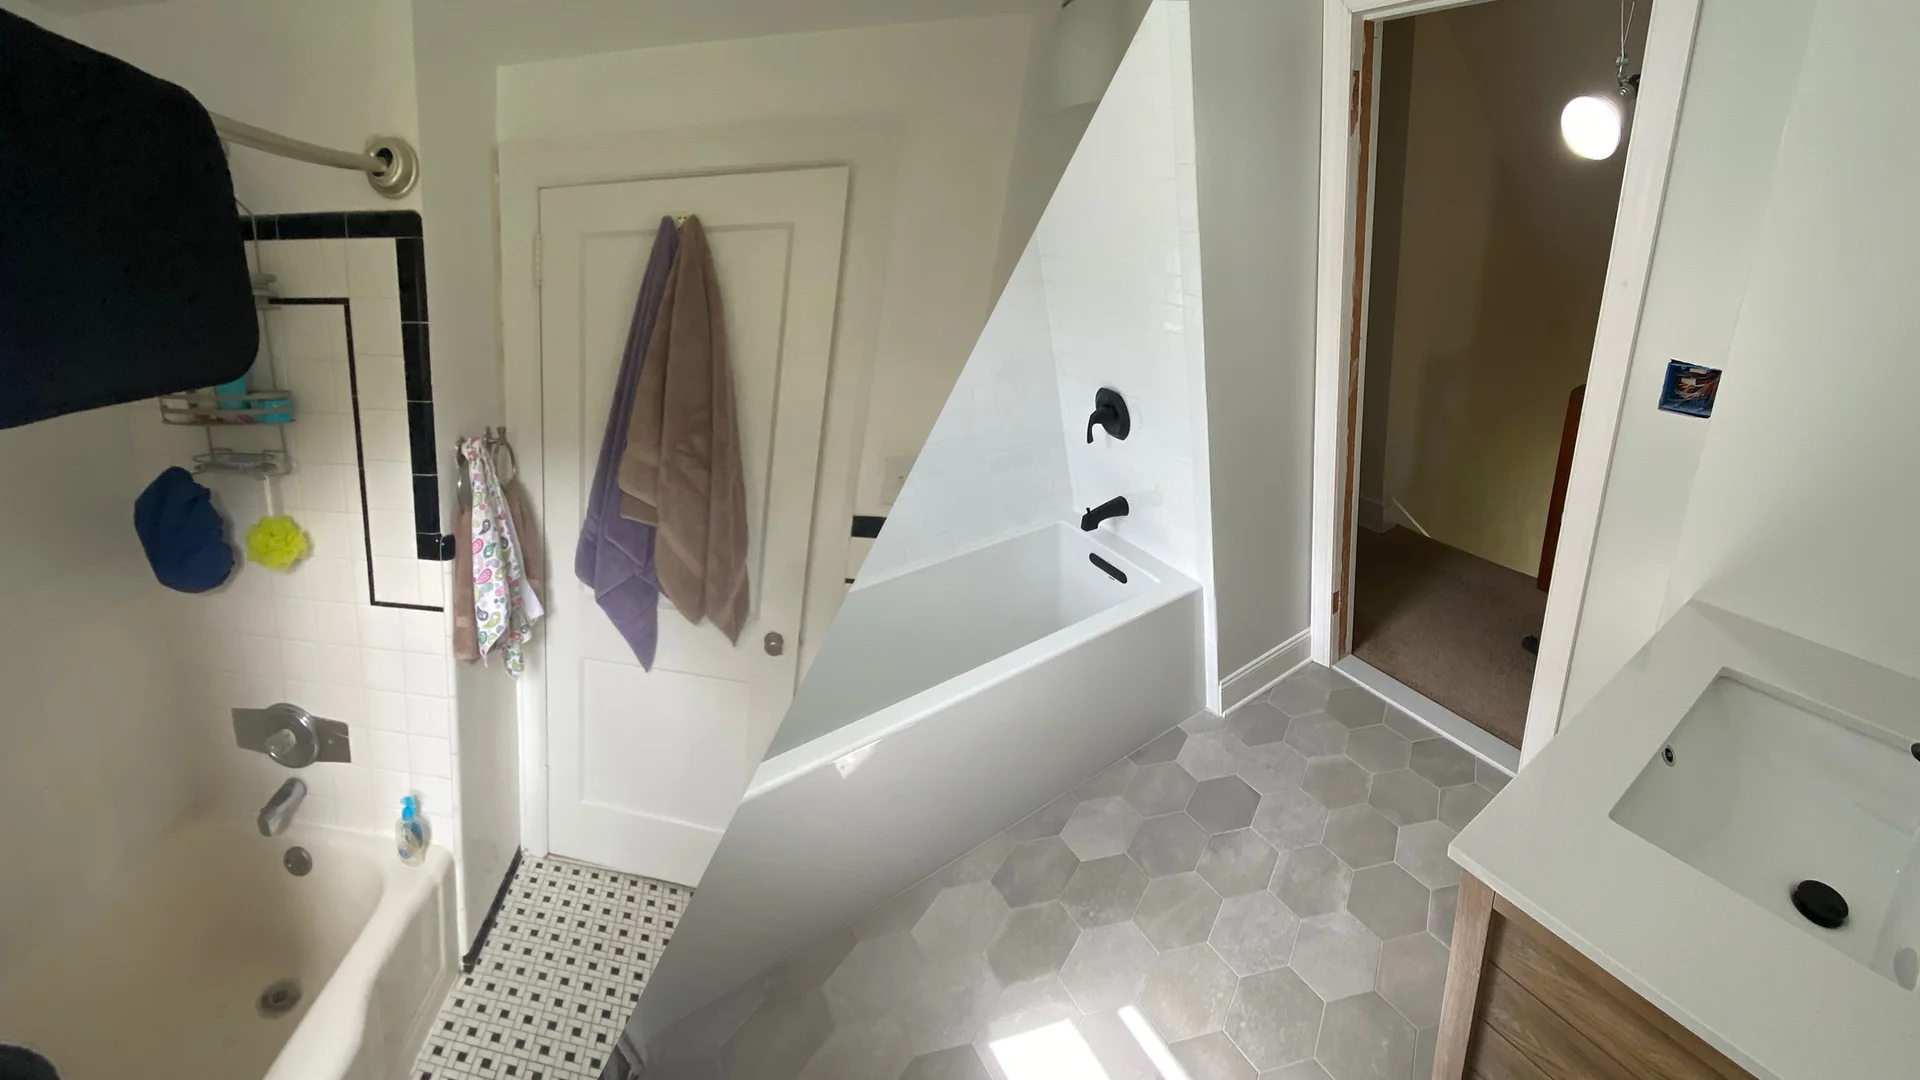
One of the biggest questions homeowners want to know is “How much does it cost to renovate your bathroom you do it yourself?” Well, that’s a loaded question — there are so many factors that go into determining the final cost of renovating a bathroom so one size does not fit all. The layout of the bathroom, the material you use, and the inevitable issues that arise all contribute to your overall costs. Most remodels involve swapping the fixtures, paint, and flooring updates. My remodel has those things, but it also involved removing a wall, completely tearing everything down to the studs, and rerouting plumbing.
Nevertheless, I’ll give you an exact figure: $14,968.81 and 8 months.
I kept every receipt and counted every expense that went towards my remodel. The cost of the permit, the tools I had to replace, the trim, and the many trips to the hardware store were all considered. This price is all-in. I mention 8 months because the money I saved doing the work myself was ultimately bartered for the time I could have saved having professionals do the job.
There are so many circumstances that come into play about why I decided to renovate my bathroom myself and why my remodel costed what it did. A lot of sacrifices had to be made (most notably by my incredibly patient darling wife), a lot of favors had to be used, and many things took far longer than expected. I had never done anything like this before and came with little-to-no experience in most trades. I’ll walk through my lessons and takeaways about the entire bathroom renovation process.
What It Really Costs: Time
There’s certainly no way to guarantee your cost will be exactly or even near what I spent on my DIY bathroom remodel — but I can guarantee that you will expend a considerable amount of time working on it should you decide to renovate your bathroom yourself. There’s a good chance you will be learning as you go on some of the more complicated jobs. Things that would normally take a contractor a few hours will take you longer. They won’t come out as well and may need to be re-done.
It’s also important to remember that this isn’t a full time job. Most likely, you won’t be able to dedicate every week day to working on the bathroom renovation. You’re left to work on weekends and weeknights and that ultimately increases the time needed to complete parts of the process exponentially. I can’t tell you how many times I would work until 10pm at night only to go to bed, wake up, and head to work the next day feeling exhausted.
Having Some Knowledgeable Friends and Family
One of the biggest resources you can have when taking on the project is your friends and family. I was incredibly fortunate to have a father AND father-in-law who had a wealth of knowledge and experience when it came to home repair and restoration. One of my neighbors and good friends is also a carpenter and general contractor. My cousin is a plumber. Another good friend does demolition and restoration work.
At some point or multiple points, I had to lean on these people for help, advice or material.
My father-in-law is a superintendent for a construction company, so using one of their dump trucks to haul all of my debris and old material to the dump saved me ~$500 and renting a dumpster.
Having my carpenter friend live two blocks from me made repairing the rotted floor joists far easier than it could have been.
My subfloor came from a friend of mine who happened to be on a demolition job. He pulled several 4’x8’ft ¾” sheets of plywood from a site and offered them up when those sheets were costing $90/ea. at the time.
At some point, Youtube tutorials are simply not going to cut it. Having a network of people to ask questions or even work side-by-side with was invaluable. There was no way this job would have got completed without them.
Hiring Contractors When It Makes Sense
When evaluating costs for taking on a bathroom remodel, you often get quotes from general contractors to do the entire job. They hire their own people for certain tasks. When you do it yourself, you still have the opportunity to use subcontractors in the same fashion.
Take into consideration what jobs you are familiar with and feel confident doing. The same goes for ones you aren’t so knowledgeable on and might be better hiring someone else to handle. If evaluated wisely, you can often save yourself a ton of headache and time.
In my case, I hired a plumbing company to do the entire plumbing job — from pulling permits, roughing in the supply and drain lines, and installing the fixtures. While I felt very confident putting in a shower faucet or sink drain, I wasn’t privy to the permit process for the county, or the tricks for angling a drain line at the correct degree for code, or sweating copper pipes. You also need to submit plans and sketches for the permit, as well.
I also used an electrician. Not only for something like that I had no prior experience, but in the state of Delaware where I live, you must used a licensed electrician to perform any substantial electrical work. Since I was going through the county for *my* permits, there wasn’t any way around this and I truly didn’t feel comfortable doing the work anyway.
Remodeling For An Old House
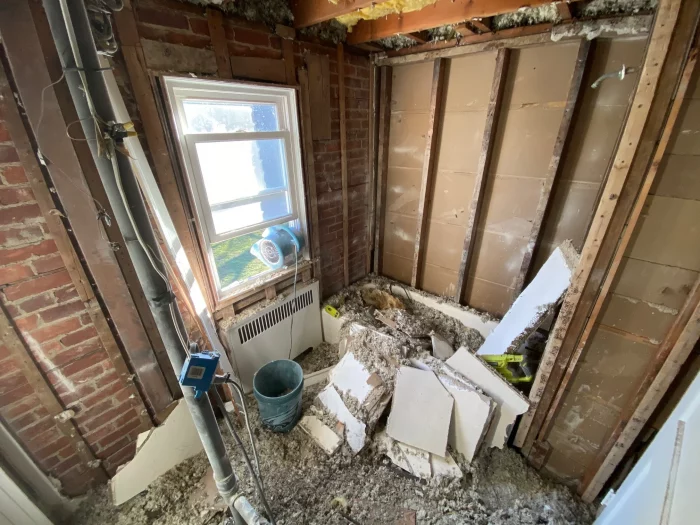
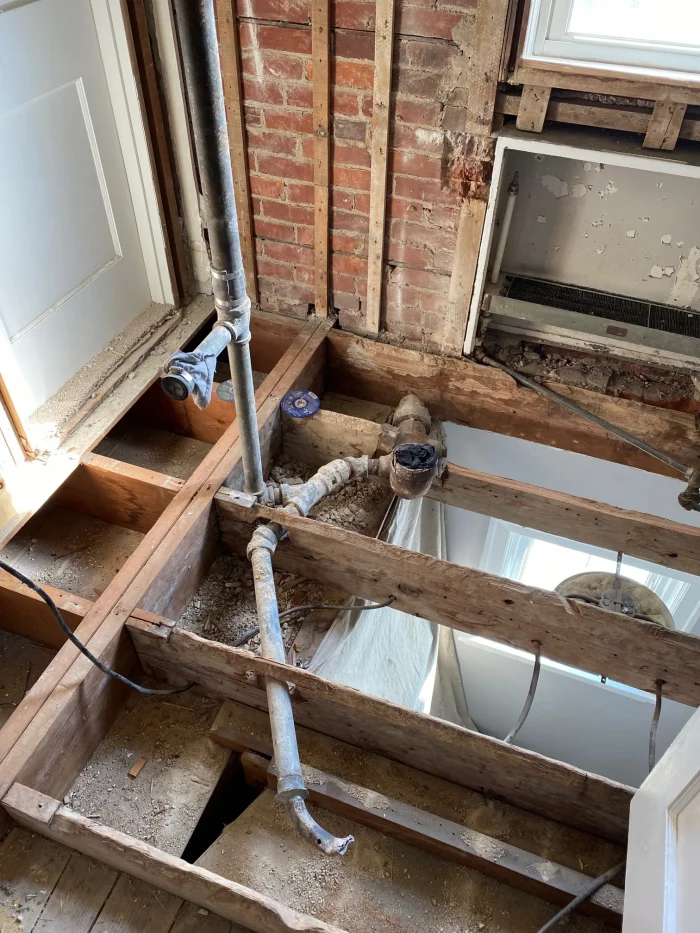
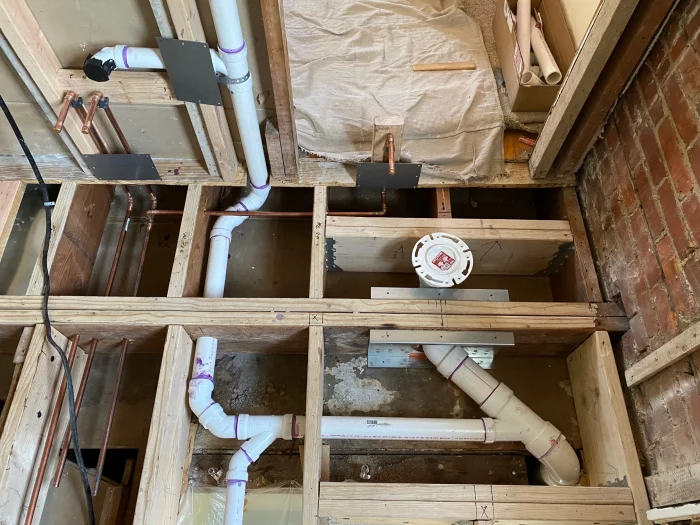
While many remodels simply involve replacing fixtures, paint, and updating other areas, an older home often requires a bit more. The entire reason we started this project was two-fold. 1) The bathroom we had was small and every bit of it was outdated. 2) The plumbing was failing in almost every part of the house. The upstairs was leaking into the ceiling of the downstairs. The downstairs was getting backed up and the toilet had been leaking into the subfloor for quite some time causing it to rot.
Our home was also constructed in a time before cement board, so tile was often installed overtop of metal lath and poured concrete. I learned the hard way that these bathrooms were constructed like bomb shelters and the concrete was about 4-6″ deep. They would crown the joists so the concrete would span across and the rest just poured down in between. The walls used the same sort of approach and it made demolition a tedious job.
It also meant that a good span of the plumbing was completely encased in this concrete. Any repairs to just the plumbing was almost impossible. This may not be the case when you choose to renovate your bathroom.
The Costs of Demolition
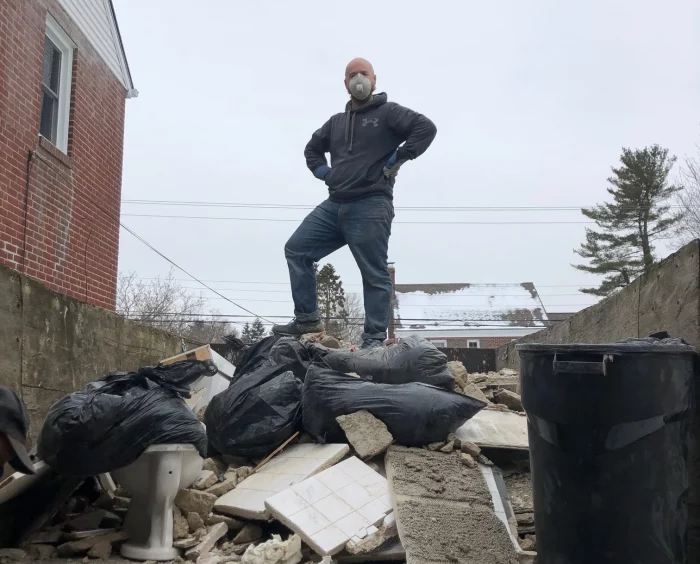
I performed 100% of the demolition myself. It was incredibly arduous and took about 30 days to complete. As mentioned, a majority of the tile was installed over poured concrete, so one man with an angle grinder slicing away took a considerable amount of time. The cast iron tub weighed about 400lbs and needed to be cut into 4 pieces just to solely remove it. I spent many trips up and down the stairs, piece by piece, moving the debris into my garage.
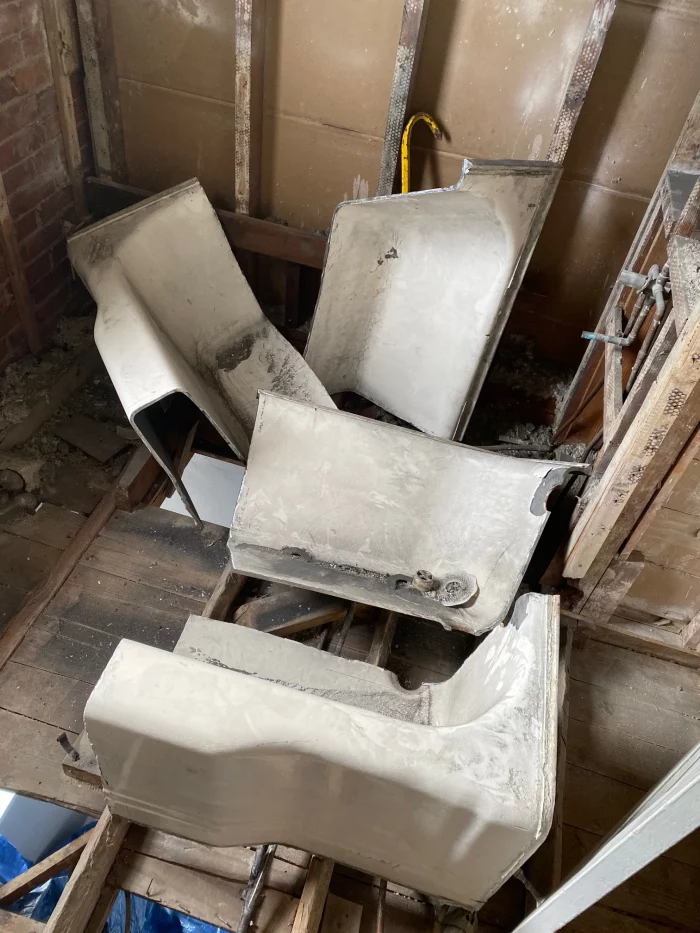

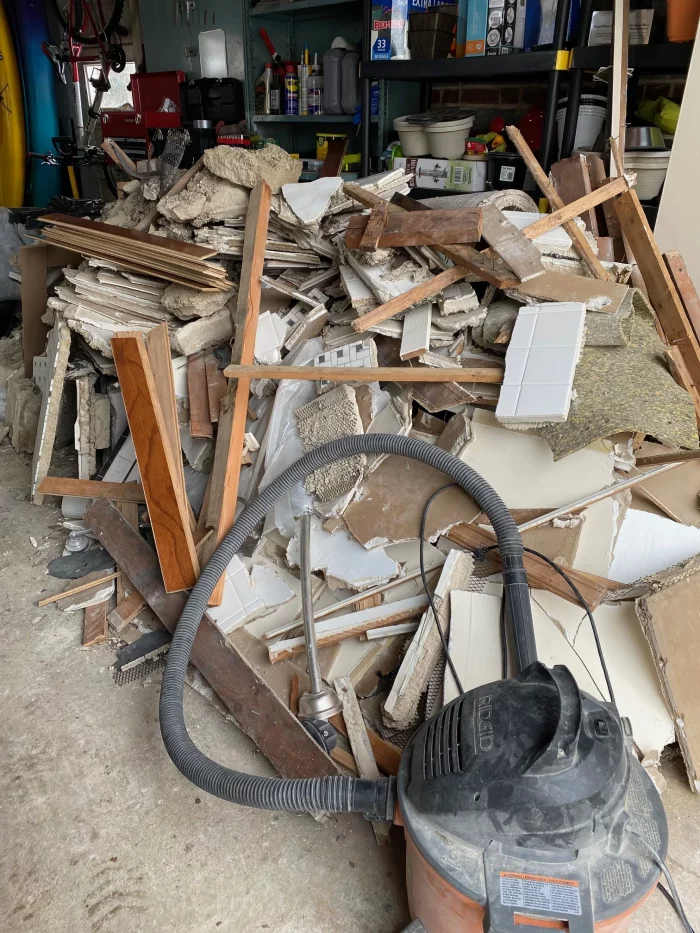
In the end, it was loaded into a dump truck and taken to the dump. The bill for about 4000lbs of trash was $174.25. I spared myself the expense of a dumpster and any other fees, but traded that off with the hard labor of moving it all slowly. I was able to scrap the tub and recoup about $80.00 of that back.
Part of this bathroom remodel involved removing a non-load-bearing wall. This wall was adjacent to the 3rd bedroom of the house and was used as the closet for that room. To help increase the square footage of the bathroom, I opted to remove this closet, use the area for the bathroom. Later, I would reframe a new, smaller closet in the 3rd bedroom. Things like this won’t always come up when you renovate your bathroom but it is worthwhile to consider.
The Costs of Repairs
No bathroom remodel comes without any headaches or unexpected costs and mine was no different. Between removing a wall, plumbing, electric, and stripping everything down the studs, I discovered plenty of issues now that everything was exposed.
For starters, the old plumbing was completely rotted. The galvanized steel has all but eroded causing leaks. The cast iron stack was corroded and rotting away. That was all going to get replaced anyway, but it was in poorer condition than expected. More portions of the stack needed to be replace with PVC and the ventilation all running up to the roof needed to be replaced with PVC as well.
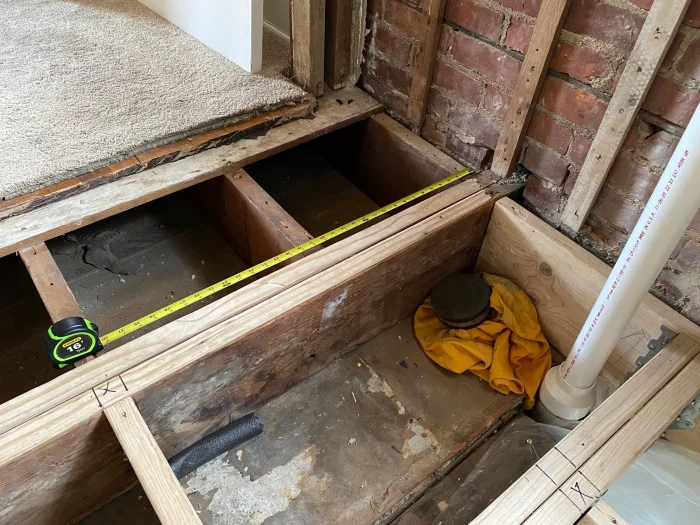
It got worse as I came to find that the floor joists were either notched entirely too much, decayed, or ruined by termites. More time and costs had to be set aside in order to get everything to a place where not only I felt safe walking on, but where inspectors would deem up to code. This circles back to having a good network of friends, as one of mine helped tremendously with the replacement of those. It couldn’t have been a job for one person. You may not encounter this when you renovate your bathroom.
The Costs of Moving Fixtures
Another hurdle that arose was routing the plumbing. As mentioned, we removed a wall to make the bathroom bigger. This moved the sink and toilet fixtures further back and put more hurdles in between them and the stack in order to route the drain pipes. There were two support beams running perpendicular to my floor joists right in between the stack, old plumbing, and where I wanted the new plumbing to go.
When you renovate your bathroom, you are allowed to notch or bore a hole into floor joists up to a certain percentage amount. For smaller fixtures, electrical, etc, this rarely becomes a problem. For a toilet, it requires a much larger drain pipe and a normal boring would fail inspection and also be unsafe. Boring/notching too much of a supporting joist could cause it to fail.
In the end, I found a very unique solution after hours and hours of Googling. I even posted to a DIY forum asking for advice. As it turns out, a company manufacturers steel reinforcement plates to tackle problems just like these and still keep the joist safe and up to code. The plumbers didn’t really care but they were able to easily do the rough-in with no issues!
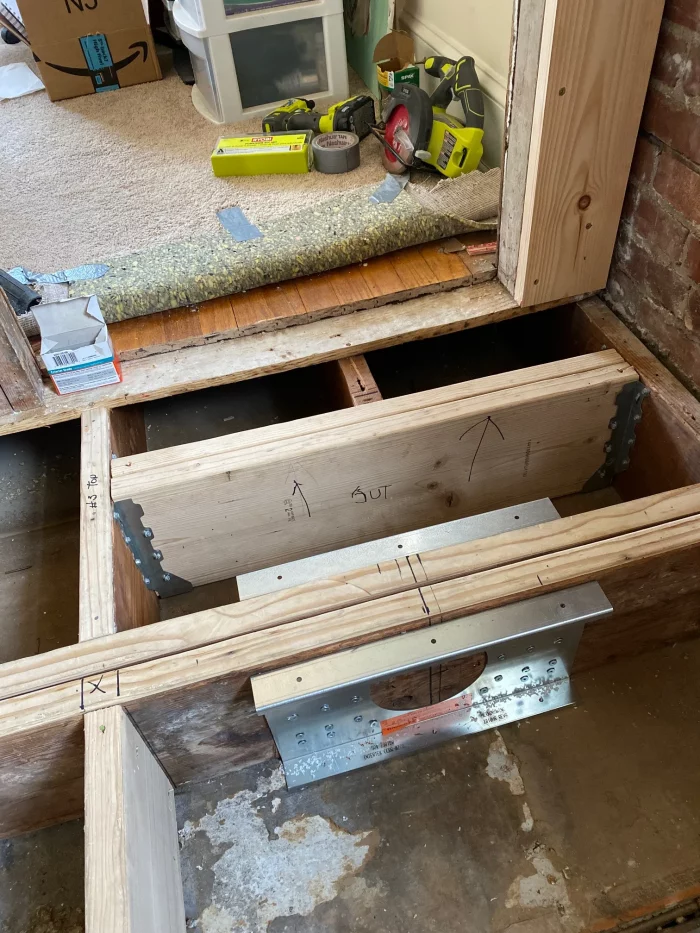
A unique issue like this not only added additional costs, but I couldn’t quantify the hours spent figuring out how to solve it. I spent hours and hours researching. It involved confirming with my county inspector that this would pass inspection. I had to wait for the plates to arrive and install them, all while trying to schedule a plumber to come out after much delay. Had I not found this solution, it’s very likely the whole bathroom remodel would have had to change.
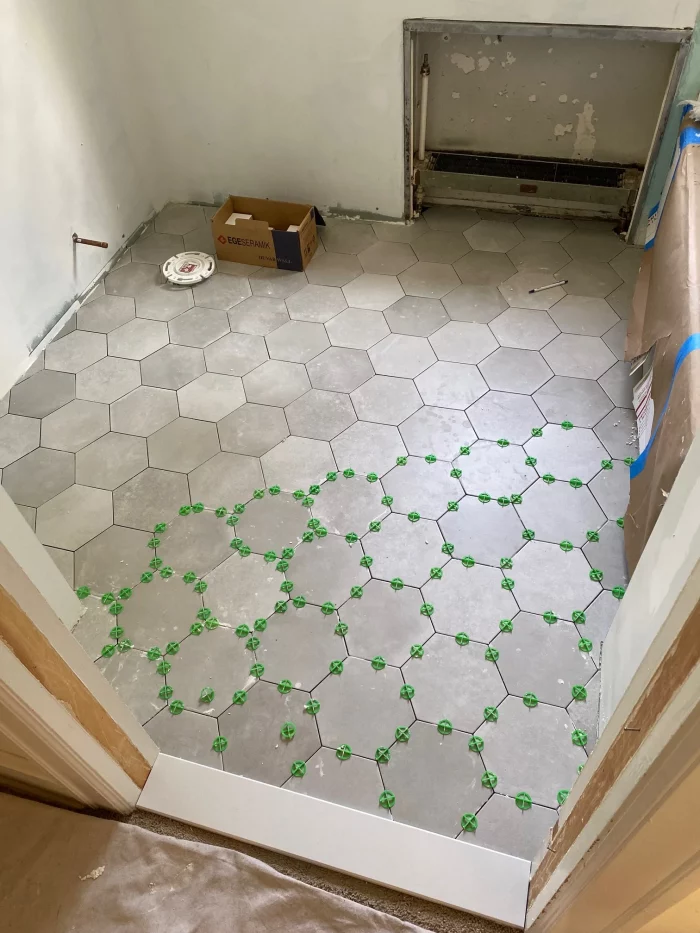
The Costs of Updates
After all of the demolition, repair, headaches and setbacks, it was finally time to start remodeling the bathroom! Since my wife and I had waited so long and spent so much effort into this project, I wanted to use higher end products for the upgrades. From the lighting, tile, grout, tub, toilet, sink, paint, and everything in between, I made sure to get a reputable product that wouldn’t have me revisiting this project any time soon.
During the planning and demolition/repair, I spent a lot of time on my phone looking for sales and deals for new fixtures and material. It really ended up saving a considerable amount, although sometimes things were simply needed and the retail price had to be paid.
Fixture Reviews To Renovate Your Bathroom
Below were some of the fixtures and material used:
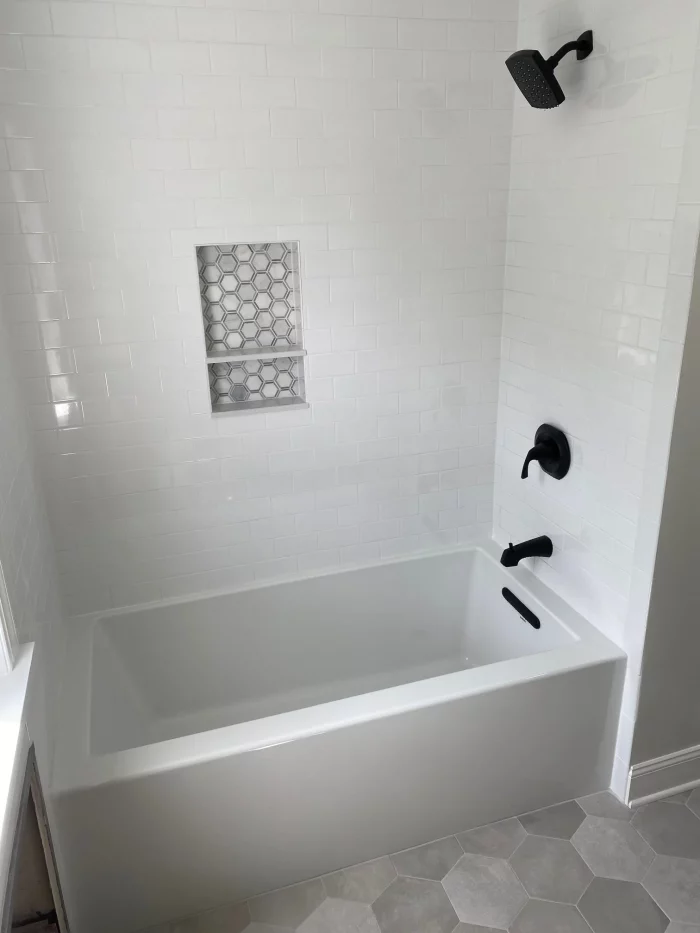
Kohler 30×60 Underscore Tub – This was a great bathtub. Though the overflow drain has a special design that requires it’s own part, the quality felt great and it’s really held up in the 2 years it’s been installed. One thing about this tub is that it is DEEP. It holds a ton of water and the sides are fairly high. That was never an issue for me, but it’s something to note.
Kohler Cimarron 360 Flush Toilet – I’ve been very happy with this toilet. Chair high seating. Elongated bowl. Another high quality product and the 360-flush absolutely cuts down on the frequency of cleaning it.
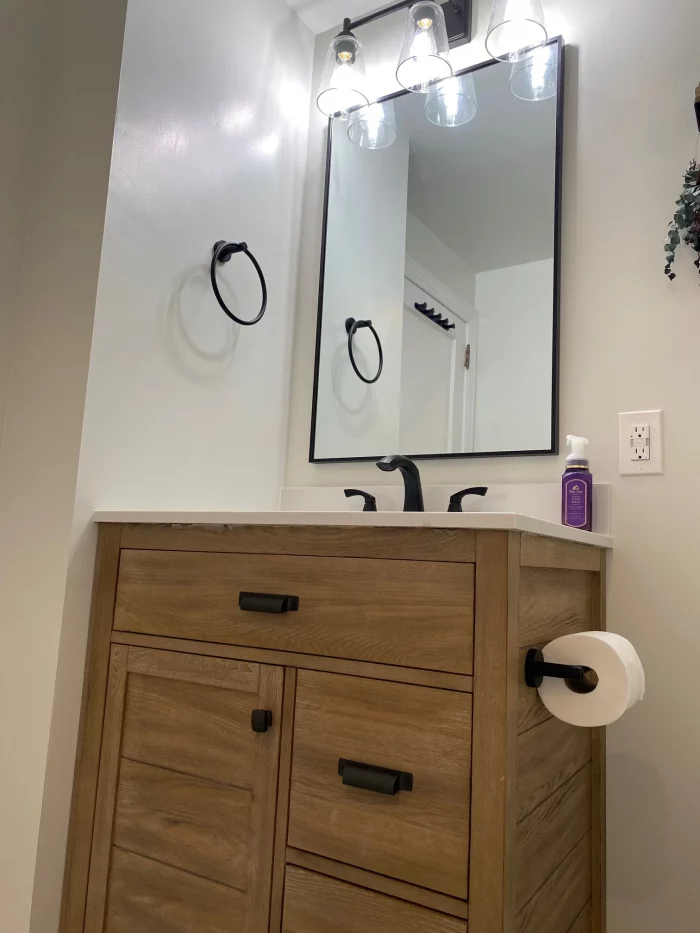
Home Decorators Stanhope Reclaimed 31″ Oak Vanity – Overall, the vanity was great and matched the look I was hoping to achieve. The actual hardware, wood finishes, and engineered stone top were good quality. Like some of the reviews suggest, though, there was some quality control lacking when it was put together. Under the countertop, you could see globs of glue and tissue paper still stuck to the oak. The holes for the faucet handles were not centered. Not so bad it’s an eyesore, but when you are renovating everything in your house, the details like this will get noticed. I got it on sale for a great deal, so I accepted it.
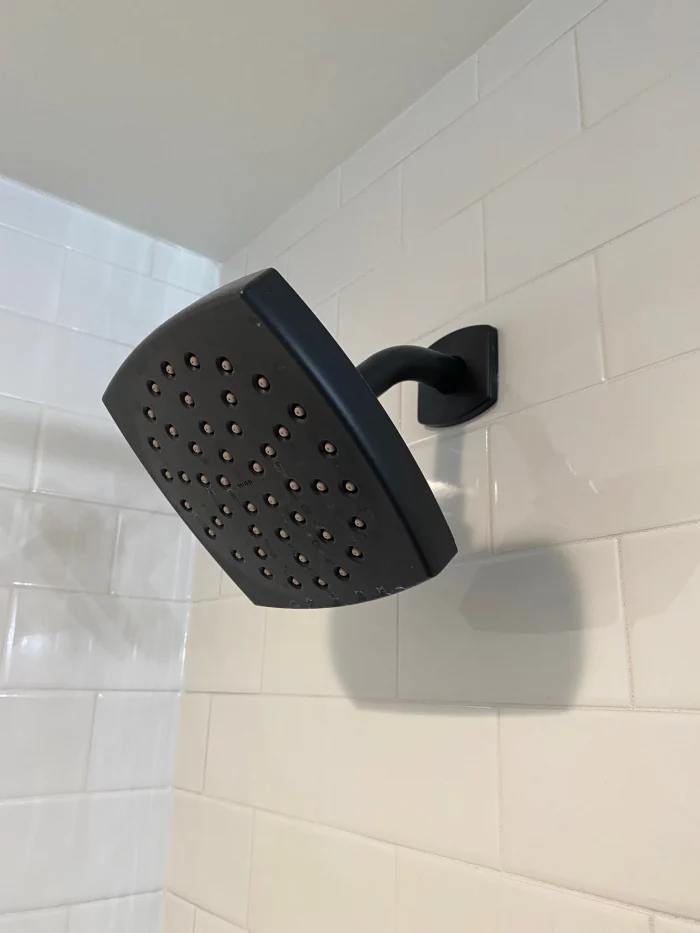
Moen Lindor Black Single Handle Tub/Shower Fixture – The black hardware worked well with the minimalist vibe. The shower cartridge on this unit did go bad after a year, but Moen was quick to replace it for free which is included in the lifetime warranty of the fixtures. They also provided a very generous discount coupon that I would later used to upgrade the shower head to an extendable dual showerhead with handle, the Graeden Matte Black.
Moen Lindor Black Two Handle Faucet – No complaints here. Fit the aesthetic of the bathroom well and have had no issues.
Conclusion
Ultimately, however you decide to renovate your bathroom will determine the cost. As mentioned, the sacrifices will go well beyond the cost and you should choose wisely how much you’d like to tackle yourself. Always consider the pros and cons for bathroom renovations when it comes to DIY. My journey encountered many obstacles and prolonged the time budget I had originally accounted for. If you are willing to plan diligently, learn, and set aside a reasonable budget, you too can renovate your bathroom and have a gorgeous looking update to your house!